Overview
This engine template recommends products that are "similar" to the input product(s). Similarity is not defined by user or item attributes but by users' previous actions. By default, it uses 'view' action such that product A and B are considered similar if most users who view A also view B. The template can be customized to support other action types such as buy, rate, like..etc.
This template is ideal for recommending products to customers based on their recent actions. Using the IDs of the recently viewed products of a customer as the Query, the engine will predict other products that this customer may also like.
This approach works perfectly for customers who are first-time visitors or have not signed in. Recommendations are made dynamically in real-time based on the most recent product preference you provide in the Query. You can, therefore, recommend products to visitors without knowing a long history about them.
You can also use this template to build the popular feature of Amazon: "Customers Who Viewed This Item Also Viewed..." quickly. Help your customers explore more products that they like, and sell more products.
Usage
Event Data Requirements
By default, this template takes the following data from Event Server as Training Data:
- User $set events
- Item $set events with categories properties
- Users' view item events
Input Query
- List of ItemIDs, which are the targeted products
- N (number of items to be recommended)
- List of white-listed item categories (optional)
- List of white-listed ItemIds (optional)
- List of black-listed ItemIds (optional)
The template also supports black-list and white-list. If a white-list is provided, the engine will include only those products in the recommendation. Likewise, if a black-list is provided, the engine will exclude those products in the recommendation.
Output PredictedResult
- a ranked list of recommended itemIDs
1. Install and Run PredictionIO
First you need to install PredictionIO 0.14.0 (if you haven't done it).
Let's say you have installed PredictionIO at /home/yourname/PredictionIO/. For convenience, add PredictionIO's binary command path to your PATH, i.e. /home/yourname/PredictionIO/bin:
1 | $ PATH=$PATH:/home/yourname/PredictionIO/bin; export PATH |
Once you have completed the installation process, please make sure all the components (PredictionIO Event Server, Elasticsearch, and HBase) are up and running.
If you are using PostgreSQL or MySQL, run the following to start PredictionIO Event Server:
1 | $ pio eventserver &
|
If instead you are running HBase and Elasticsearch, run the following to start all PredictionIO Event Server, HBase, and Elasticsearch:
1 | $ pio-start-all
|
You can check the status by running:
1 | $ pio status
|
If everything is OK, you should see the following outputs:
1 2 3 4 | ... (sleeping 5 seconds for all messages to show up...) Your system is all ready to go. |
2. Create a new Engine from an Engine Template
Now let's create a new engine called MySimilarProduct by downloading the Similar Product Engine Template. Go to a directory where you want to put your engine and run the following:
1 2 | $ git clone https://github.com/apache/predictionio-template-similar-product.git MySimilarProduct $ cd MySimilarProduct |
A new directory MySimilarProduct is created, where you can find the downloaded engine template.
3. Generate an App ID and Access Key
You will need to create a new App in PredictionIO to store all the data of your app. The data collected will be used for machine learning modeling.
Let's assume you want to use this engine in an application named "MyApp1". Run the following to create a new app "MyApp1":
1 | $ pio app new MyApp1
|
You should find the following in the console output:
1 2 3 4 5 6 | ... [INFO] [App$] Initialized Event Store for this app ID: 1. [INFO] [App$] Created new app: [INFO] [App$] Name: MyApp1 [INFO] [App$] ID: 1 [INFO] [App$] Access Key: 3mZWDzci2D5YsqAnqNnXH9SB6Rg3dsTBs8iHkK6X2i54IQsIZI1eEeQQyMfs7b3F |
Note that App ID, **Access Key* are created for this App "MyApp1". You will need the Access Key when you collect data with EventServer for this App.
You can list all of the apps created its corresponding ID and Access Key by running the following command:
1 | $ pio app list
|
You should see a list of apps created. For example:
1 2 3 4 | [INFO] [App$] Name | ID | Access Key | Allowed Event(s) [INFO] [App$] MyApp1 | 1 | 3mZWDzci2D5YsqAnqNnXH9SB6Rg3dsTBs8iHkK6X2i54IQsIZI1eEeQQyMfs7b3F | (all) [INFO] [App$] MyApp2 | 2 | io5lz6Eg4m3Xe4JZTBFE13GMAf1dhFl6ZteuJfrO84XpdOz9wRCrDU44EUaYuXq5 | (all) [INFO] [App$] Finished listing 2 app(s). |
4. Collecting Data
Next, let's collect some training data for the app of this Engine. By default, the Similar Product Engine Template supports 2 types of entities: user and item, and event view. An item has the categories property, which is a list of category names (String). A user can view an item. Respectively, this template requires '$set' user event, '$set' item event, and user-view-item events.
You can send these events to PredictionIO Event Server in real-time easily by making a HTTP request or through the provided SDK. Please see App Integration Overview for more details how to integrate your app with SDK.
Let's try sending events to EventServer with the following curl commands (The corresponding SDK code is showed in other tabs).
Replace <ACCCESS_KEY> by the Access Key generated in above steps. Note that localhost:7070 is the default URL of the Event Server.
For convenience, set your access key to the shell variable, run:
$ ACCESS_KEY=<ACCESS_KEY>
For example, when a new user with id "u0" is created in your app on time 2014-11-02T09:39:45.618-08:00 (current time will be used if eventTime is not specified), you can send a $set event for this user. To send this event, run the following curl command:
1 2 3 4 5 6 7 8 | $ curl -i -X POST http://localhost:7070/events.json?accessKey=$ACCESS_KEY \ -H "Content-Type: application/json" \ -d '{ "event" : "$set", "entityType" : "user", "entityId" : "u0", "eventTime" : "2014-11-02T09:39:45.618-08:00" }' |
1 2 3 4 5 6 7 8 9 10 11 12 13 14 15 16 17 18 19 20 | import predictionio from datetime import datetime client = predictionio.EventClient( access_key=<ACCESS KEY>, url=<URL OF EVENTSERVER>, threads=5, qsize=500 ) # Create a new user client.create_event( event="$set", entity_type="user", entity_id=<USER_ID>, # current time will be used if event_time is not specified event_time=datetime( 2014, 11, 02, 09, 39, 45, 618000, pytz.timezone('US/Pacific') ) |
1 2 3 4 5 6 7 8 9 10 11 12 13 | <?php require_once("vendor/autoload.php"); use predictionio\EventClient; $client = new EventClient(<ACCESS KEY>, <URL OF EVENTSERVER>); // Create a new user $client->createEvent(array( 'event' => '$set', 'entityType' => 'user', 'entityId' => <USER ID> )); ?> |
1 2 3 4 5 6 7 8 9 | # Create a client object. client = PredictionIO::EventClient.new(<ACCESS KEY>, <URL OF EVENTSERVER>) # Create a new user client.create_event( '$set', 'user', <USER ID> ) |
1 2 3 4 5 6 7 8 9 10 11 12 13 | import org.apache.predictionio.Event; import org.apache.predictionio.EventClient; import com.google.common.collect.ImmutableList; EventClient client = new EventClient(<ACCESS KEY>, <URL OF EVENTSERVER>); // Create a new user Event userEvent = new Event() .event("$set") .entityType("user") .entityId(<USER_ID>); client.createEvent(userEvent); |
When a new item "i0" is created in your app on time 2014-11-02T09:39:45.618-08:00 (current time will be used if eventTime is not specified), you can send a $set event for the item. Note that the item is set with categories properties: "c1" and "c2". Run the following curl command:
1 2 3 4 5 6 7 8 9 10 11 | $ curl -i -X POST http://localhost:7070/events.json?accessKey=$ACCESS_KEY \ -H "Content-Type: application/json" \ -d '{ "event" : "$set", "entityType" : "item", "entityId" : "i0", "properties" : { "categories" : ["c1", "c2"] } "eventTime" : "2014-11-02T09:39:45.618-08:00" }' |
1 2 3 4 5 6 7 8 9 10 | # Create a new item or set existing item's categories client.create_event( event="$set", entity_type="item", entity_id=item_id, properties={ "categories" : ["<CATEGORY_1>", "<CATEGORY_2>"] } ) |
1 2 3 4 5 6 7 8 9 10 11 | <?php // Create a new item or set existing item's categories $client->createEvent(array( 'event' => '$set', 'entityType' => 'item', 'entityId' => <ITEM ID> 'properties' => array('categories' => array('<CATEGORY_1>', '<CATEGORY_2>')) )); ?> |
1 2 3 4 5 6 7 8 9 | # Create a new item or set existing item's categories client.create_event( '$set', 'item', <ITEM ID>, { 'properties' => { 'categories' => ['<CATEGORY_1>', '<CATEGORY_2>'] } } ) |
1 2 3 4 5 6 7 | // Create a new item or set existing item's categories Event itemEvent = new Event() .event("$set") .entityType("item") .entityId(<ITEM_ID>) .property("categories", ImmutableList.of("<CATEGORY_1>", "<CATEGORY_2>")); client.createEvent(itemEvent) |
When the user "u0" view item "i0" on time 2014-11-10T12:34:56.123-08:00 (current time will be used if eventTime is not specified), you can send a view event. Run the following curl command:
1 2 3 4 5 6 7 8 9 10 | $ curl -i -X POST http://localhost:7070/events.json?accessKey=$ACCESS_KEY \ -H "Content-Type: application/json" \ -d '{ "event" : "view", "entityType" : "user", "entityId" : "u0", "targetEntityType" : "item", "targetEntityId" : "i0", "eventTime" : "2014-11-10T12:34:56.123-08:00" }' |
1 2 3 4 5 6 7 8 9 | # A user views an item client.create_event( event="view", entity_type="user", entity_id=<USER ID>, target_entity_type="item", target_entity_id=<ITEM ID> ) |
1 2 3 4 5 6 7 8 9 10 | <?php // A user views an item $client->createEvent(array( 'event' => 'view', 'entityType' => 'user', 'entityId' => <USER ID>, 'targetEntityType' => 'item', 'targetEntityId' => <ITEM ID> )); ?> |
1 2 3 4 5 6 7 8 9 | # A user views an item. client.create_event( 'view', 'user', <USER ID>, { 'targetEntityType' => 'item', 'targetEntityId' => <ITEM ID> } ) |
1 2 3 4 5 6 7 8 9 | // A user views an item Event viewEvent = new Event() .event("view") .entityType("user") .entityId(<USER_ID>) .targetEntityType("item") .targetEntityId(<ITEM_ID>); client.createEvent(viewEvent); |
Query Event Server
Now let's query the EventServer and see if these events are imported successfully.
Go to following URL with your browser:
http://localhost:7070/events.json?accessKey=<YOUR_ACCESS_KEY>
or run the following command in terminal:
1 | $ curl -i -X GET "http://localhost:7070/events.json?accessKey=$ACCESS_KEY" |
It should return the imported events in JSON format. You can refer to Event Server Debugging Recipes for more different ways to query Event Server.
Import More Sample Data
This engine requires more data in order to train a useful model. Instead of sending more events one by one in real time, for quickstart demonstration purpose, we are going to use a script to import more events in batch.
A Python import script import_eventserver.py is provided to import sample data. It imports 10 users (with user ID "u1" to "u10") and 50 items (with item ID "i1" to "i50") with some random assigned categories ( with categories "c1" to "c6"). Each user then randomly view 10 items.
First, you will need to install Python SDK in order to run the sample data import script. To install Python SDK, run:
1 | $ pip install predictionio
|
or
1 | $ easy_install predictionio
|
Make sure you are under the MySimilarProduct directory. Execute the following to import the data:
1 2 | $ cd MySimilarProduct $ python data/import_eventserver.py --access_key $ACCESS_KEY |
You should see the following output:
1 2 3 4 5 6 7 8 | ... User u10 views item i20 User u10 views item i17 User u10 views item i22 User u10 views item i31 User u10 views item i18 User u10 views item i29 160 events are imported. |
You can query the event server again as described previously to check the imported events.
5. Deploy the Engine as a Service
Now you can build, train, and deploy the engine. First, make sure you are under the MySimilarProduct directory.
1 | $ cd MySimilarProduct |
Engine.json
Under the directory, you should find an engine.json file; this is where you specify parameters for the engine.
1 2 3 4 5 6 7 | ... "datasource": { "params" : { "appName": "MyApp1" } }, ... |
Building
Start with building your MySimilarProduct engine. Run the following command:
1 | $ pio build --verbose
|
This command should take few minutes for the first time; all subsequent builds should be less than a minute. You can also run it without --verbose if you don't want to see all the log messages.
Upon successful build, you should see a console message similar to the following.
1 | [INFO] [Console$] Your engine is ready for training. |
Training the Predictive Model
To train your engine, run the following command:
1 | $ pio train
|
When your engine is trained successfully, you should see a console message similar to the following.
1 | [INFO] [CoreWorkflow$] Training completed successfully. |
Deploying the Engine
Now your engine is ready to deploy. Run:
1 | $ pio deploy
|
When the engine is deployed successfully and running, you should see a console message similar to the following:
1 2 | [INFO] [HttpListener] Bound to /0.0.0.0:8000 [INFO] [MasterActor] Bind successful. Ready to serve. |
Do not kill the deployed engine process.
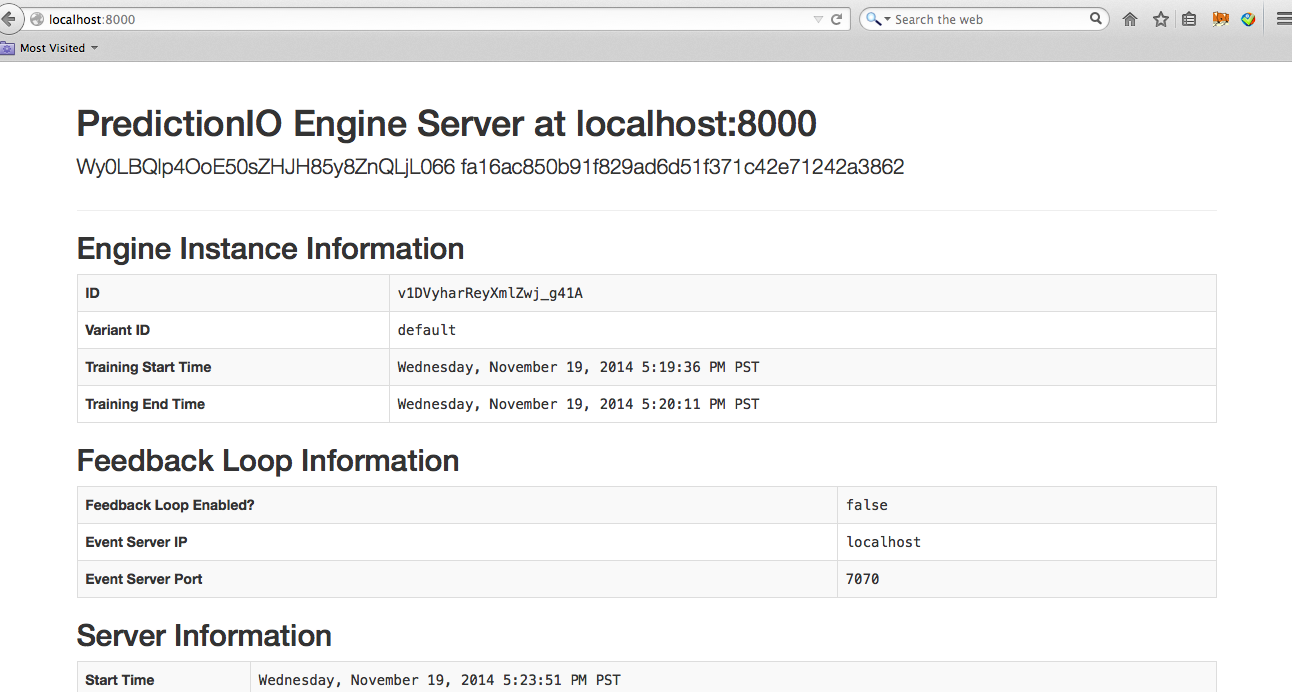
By default, the deployed engine binds to http://localhost:8000. You can visit that page in your web browser to check its status.
6. Use the Engine
Now, You can retrieve predicted results. To retrieve 4 items which are similar to item ID "i1". You send this JSON { "items": ["i1"], "num": 4 } to the deployed engine and it will return a JSON of the recommended items. Simply send a query by making a HTTP request or through the EngineClient of an SDK.
With the deployed engine running, open another terminal and run the following curl command or use SDK to send the query:
1 2 3 4 | $ curl -H "Content-Type: application/json" \ -d '{ "items": ["i1"], "num": 4 }' \ http://localhost:8000/queries.json |
1 2 3 | import predictionio engine_client = predictionio.EngineClient(url="http://localhost:8000") print engine_client.send_query({"items": ["i1"], "num": 4}) |
1 2 3 4 5 6 7 8 9 10 | <?php require_once("vendor/autoload.php"); use predictionio\EngineClient; $client = new EngineClient('http://localhost:8000'); $response = $client->sendQuery(array('items'=> array('i1'), 'num'=> 4)); print_r($response); ?> |
1 2 3 4 5 6 7 | # Create client object. client = PredictionIO::EngineClient.new('http://localhost:8000') # Query PredictionIO. response = client.send_query('items' => ['i1'], 'num' => 4) puts response |
1 2 3 4 5 6 7 8 9 10 11 12 13 14 15 | import com.google.common.collect.ImmutableMap; import com.google.common.collect.ImmutableList; import com.google.gson.JsonObject; import org.apache.predictionio.EngineClient; // create client object EngineClient engineClient = new EngineClient("http://localhost:8000"); // query JsonObject response = engineClient.sendQuery(ImmutableMap.<String, Object>of( "items", ImmutableList.of("i1"), "num", 4 )); |
The following is sample JSON response:
1 2 3 4 5 6 7 8 | { "itemScores":[ {"item":"i43","score":0.7071067811865475}, {"item":"i21","score":0.7071067811865475}, {"item":"i46","score":0.5773502691896258}, {"item":"i8","score":0.5773502691896258} ] } |
MySimilarProduct is now running.
Advanced Query
Recommend items which are similar to multiple items:
1 2 3 4 5 | curl -H "Content-Type: application/json" \ -d '{ "items": ["i1", "i3"], "num": 10}' \ http://localhost:8000/queries.json {"itemScores":[{"item":"i12","score":1.1700499715209998},{"item":"i21","score":1.1153550716504106},{"item":"i43","score":1.1153550716504106},{"item":"i14","score":1.0773502691896257},{"item":"i39","score":1.0773502691896257},{"item":"i26","score":1.0773502691896257},{"item":"i44","score":1.0773502691896257},{"item":"i38","score":0.9553418012614798},{"item":"i36","score":0.9106836025229592},{"item":"i46","score":0.9106836025229592}]} |
In addition, the Query support the following optional parameters categories, whiteList and blackList.
Recommend items in selected categories:
1 2 3 4 5 6 7 8 9 | curl -H "Content-Type: application/json" \ -d '{ "items": ["i1", "i3"], "num": 10, "categories" : ["c4", "c3"] }' \ http://localhost:8000/queries.json {"itemScores":[{"item":"i21","score":1.1153550716504106},{"item":"i14","score":1.0773502691896257},{"item":"i26","score":1.0773502691896257},{"item":"i39","score":1.0773502691896257},{"item":"i44","score":1.0773502691896257},{"item":"i45","score":0.7886751345948129},{"item":"i47","score":0.7618016810571367},{"item":"i9","score":0.7618016810571367},{"item":"i28","score":0.7618016810571367},{"item":"i6","score":0.7618016810571367}]} |
Recommend items in the whiteList:
1 2 3 4 5 6 7 8 9 10 | curl -H "Content-Type: application/json" \ -d '{ "items": ["i1", "i3"], "num": 10, "categories" : ["c4", "c3"], "whiteList": ["i21", "i26", "i40"] }' \ http://localhost:8000/queries.json {"itemScores":[{"item":"i21","score":1.1153550716504106},{"item":"i26","score":1.0773502691896257}]} |
Recommend items not in the blackList:
1 2 3 4 5 6 7 8 9 10 | curl -H "Content-Type: application/json" \ -d '{ "items": ["i1", "i3"], "num": 10, "categories" : ["c4", "c3"], "blackList": ["i21", "i26", "i40"] }' \ http://localhost:8000/queries.json {"itemScores":[{"item":"i39","score":1.0773502691896257},{"item":"i44","score":1.0773502691896257},{"item":"i14","score":1.0773502691896257},{"item":"i45","score":0.7886751345948129},{"item":"i47","score":0.7618016810571367},{"item":"i6","score":0.7618016810571367},{"item":"i28","score":0.7618016810571367},{"item":"i9","score":0.7618016810571367},{"item":"i29","score":0.6220084679281463},{"item":"i30","score":0.5386751345948129}]} |