With Spark SQL, it is possible to connect Tableau to Apache PredictionIO Event Server for interactive analysis of event data.
Prerequisites
- Tableau Desktop 8.3+ with a proper license key that supports Spark SQL;
- Spark ODBC Driver from Databricks (https://databricks.com/spark/odbc-driver-download);
- Apache Hadoop 2.4+
- Apache Hive 0.3.1+
Export Events to Apache Parquet
PredictionIO supports exporting your events to Apache Parquet, a columnar storage format that allows you to query quickly.
Let's export the data we imported in Recommendation Engine Template Quick Start, and assume the App ID is 1.
1 | $ $PIO_HOME/bin/pio export --appid 1 --output /tmp/movies --format parquet |
After the command has finished successfully, you should see something similar to the following.
1 2 3 4 5 6 7 8 9 10 11 | root |-- creationTime: string (nullable = true) |-- entityId: string (nullable = true) |-- entityType: string (nullable = true) |-- event: string (nullable = true) |-- eventId: string (nullable = true) |-- eventTime: string (nullable = true) |-- properties: struct (nullable = true) | |-- rating: double (nullable = true) |-- targetEntityId: string (nullable = true) |-- targetEntityType: string (nullable = true) |
Creating Hive Tables
Before you can use Spark SQL's Thrift JDBC/ODBC Server, you will need to create the table schema in Hive first. Please make sure to replace path_of_hive with the real path.
1 2 3 4 | $ cd path_of_hive $ bin/hive hive> CREATE EXTERNAL TABLE events (event STRING, entityType STRING, entityId STRING, targetEntityType STRING, targetEntityId STRING, properties STRUCT<rating:DOUBLE>) STORED AS parquet LOCATION '/tmp/movies'; hive> exit; |
Launch Spark SQL's Thrift JDBC/ODBC Server
Once you have created your Hive tables, create a Hive configuration in your Spark installation. If you have a custom hive-site.xml, simply copy or link it to $SPARK_HOME/conf. Otherwise, Hive would have created a local Derby database, and you will need to let Spark knows about it. Create $SPARK_HOME/conf/hive-site.xml from scratch with the following template.
1 2 3 4 5 6 7 8 | <?xml version="1.0" encoding="UTF-8" standalone="no"?> <?xml-stylesheet type="text/xsl" href="configuration.xsl"?> <configuration> <property> <name>javax.jdo.option.ConnectionURL</name> <value>jdbc:derby:;databaseName=/opt/apache-hive-0.13.1-bin/metastore_db;create=true</value> </property> </configuration> |
Launch Spark SQL's Thift JDBC/ODBC Server by
1 | $ $SPARK_HOME/sbin/start-thriftserver.sh |
You can test the server using the included Beeline client.
1 2 3 4 5 6 7 8 9 10 11 12 13 14 15 16 17 18 19 20 | $ $SPARK_HOME/bin/beeline beeline> !connect jdbc:hive2://localhost:10000 (Use empty username and password when prompted) 0: jdbc:hive2://localhost:10000> select * from events limit 10; +--------+-------------+-----------+-------------------+-----------------+------------------+ | event | entitytype | entityid | targetentitytype | targetentityid | properties | +--------+-------------+-----------+-------------------+-----------------+------------------+ | buy | user | 3 | item | 0 | {"rating":null} | | buy | user | 3 | item | 1 | {"rating":null} | | rate | user | 3 | item | 2 | {"rating":1.0} | | buy | user | 3 | item | 7 | {"rating":null} | | buy | user | 3 | item | 8 | {"rating":null} | | buy | user | 3 | item | 9 | {"rating":null} | | rate | user | 3 | item | 14 | {"rating":1.0} | | buy | user | 3 | item | 15 | {"rating":null} | | buy | user | 3 | item | 16 | {"rating":null} | | buy | user | 3 | item | 18 | {"rating":null} | +--------+-------------+-----------+-------------------+-----------------+------------------+ 10 rows selected (0.515 seconds) 0: jdbc:hive2://localhost:10000> |
Now you are ready to use Tableau!
Performing Analysis with Tableau
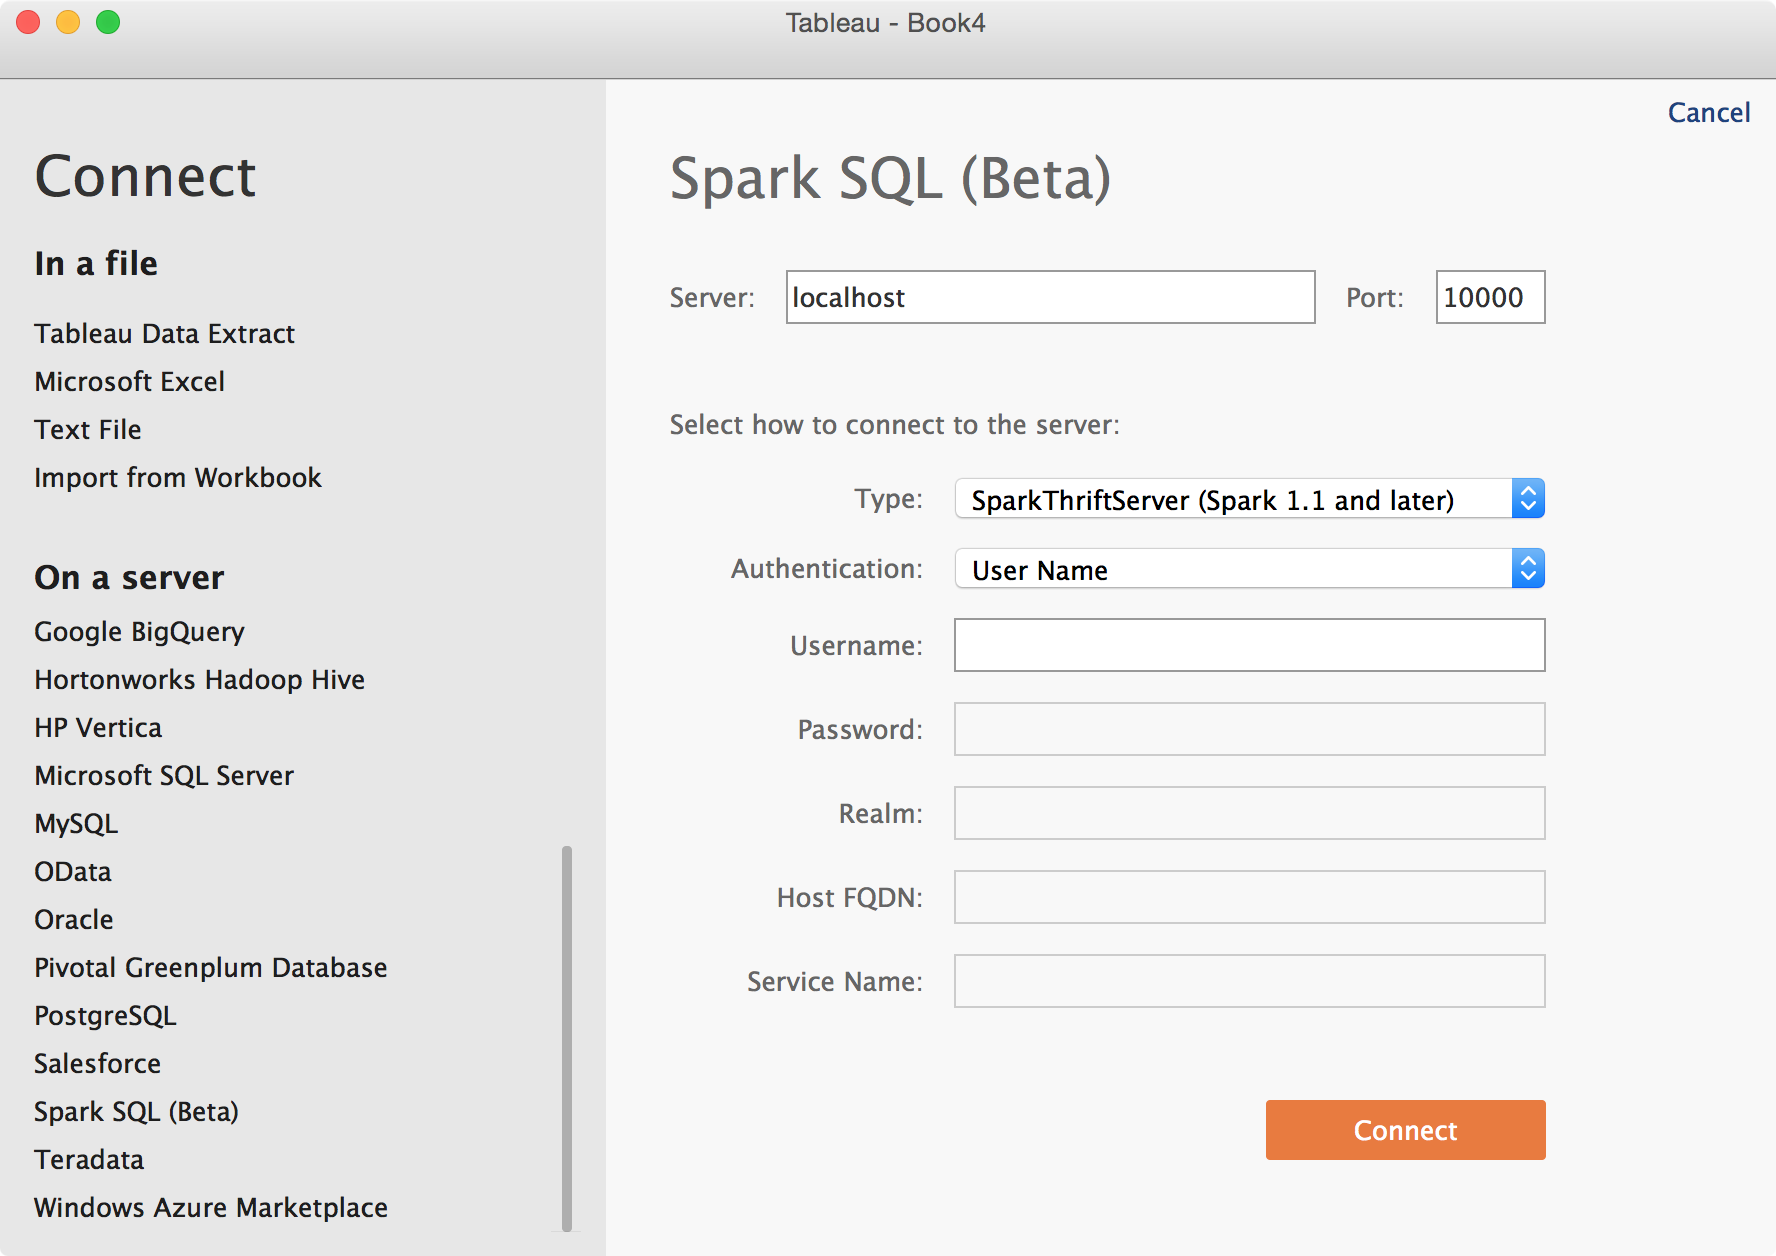
Launch Tableau and Connect to Data. Click on Spark SQL (Beta) and enter Spark SQL's Thrift JDBC/ODBC Server information. Make sure to pick User Name as Authentication. Click Connect.

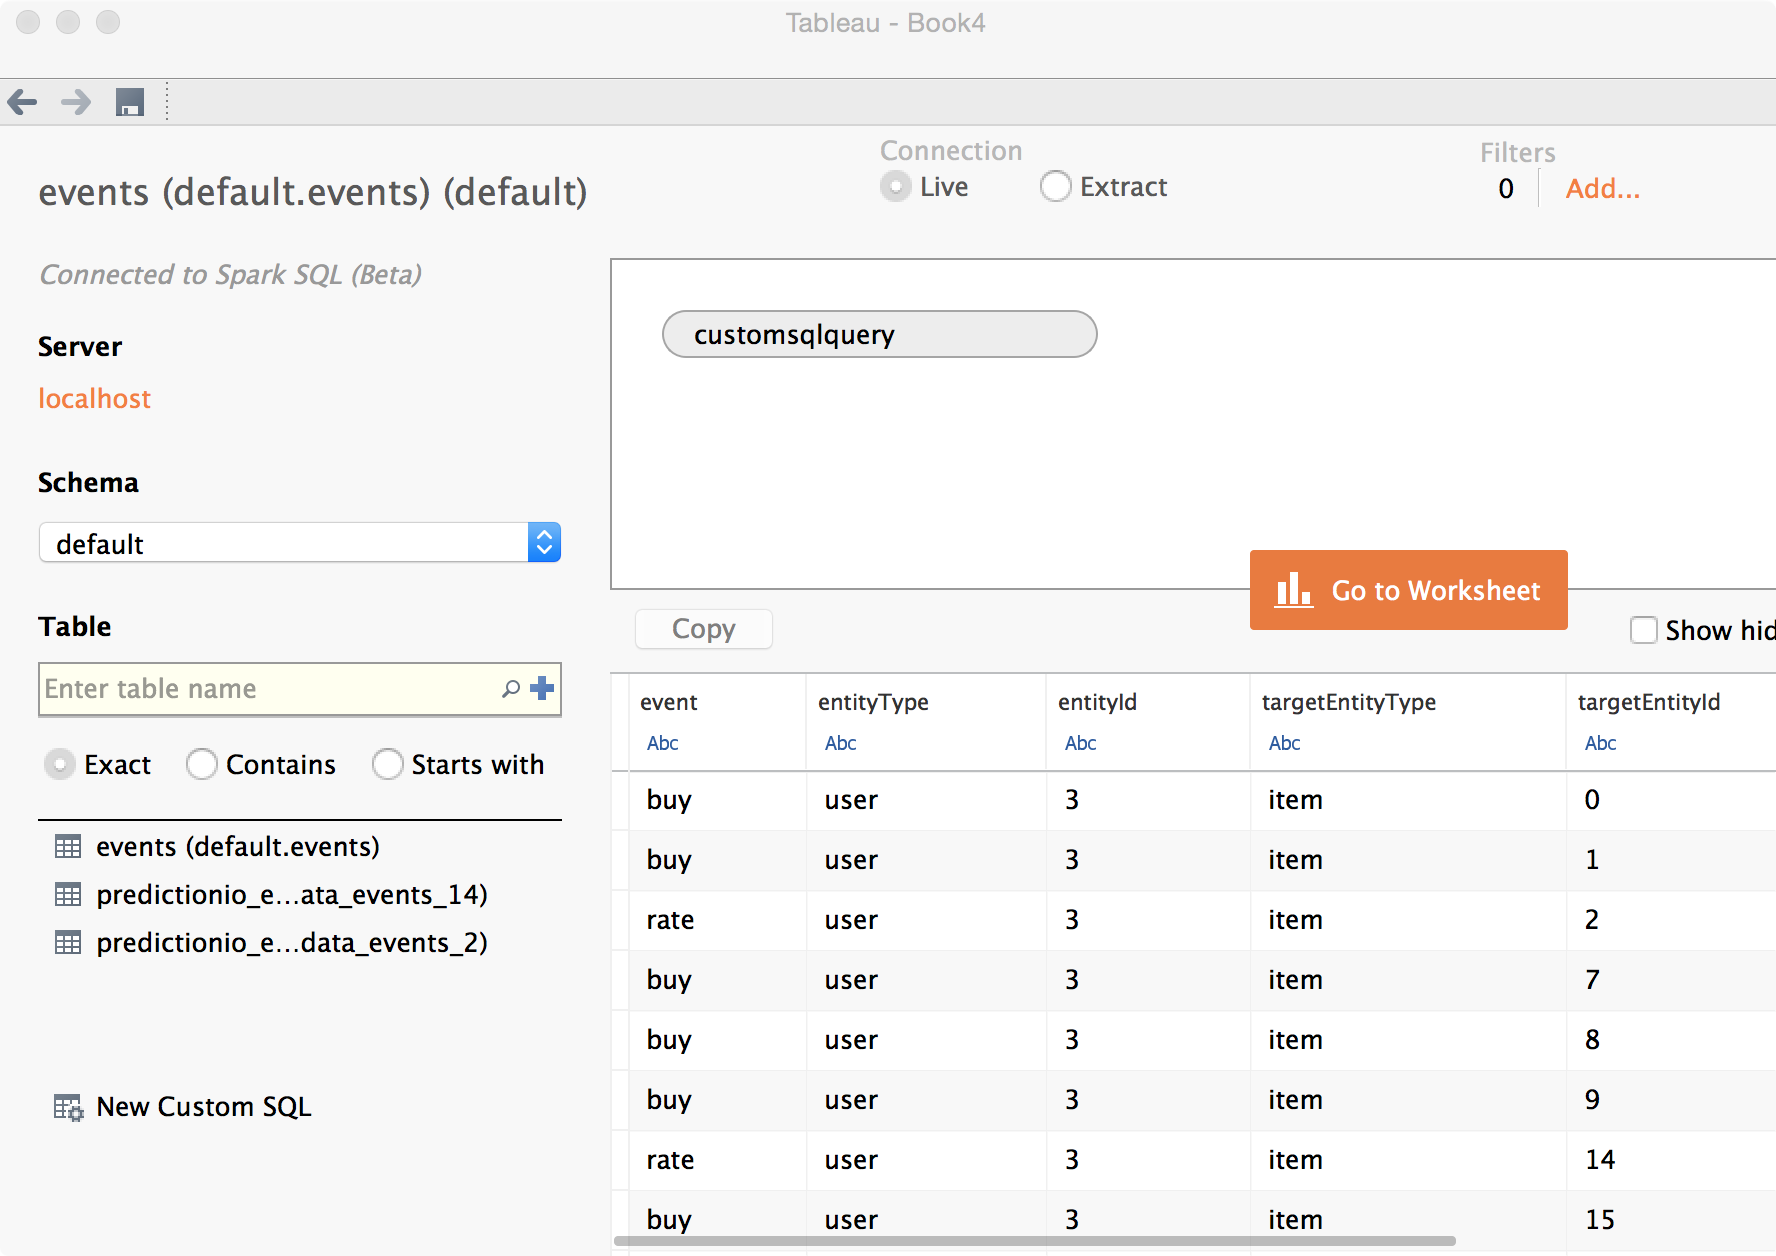
On the next page, pick default under Schema.
Once you see a list of tables that includes events, click New Custom SQL, then enter the following.
1 | SELECT event, entityType, entityId, targetEntityType, targetEntityId, properties.rating FROM events |
Click Update Now. You should see the following screen by now, indicating success in loading data. Using a custom SQL allows you to extract arbitrary fields from within properties.

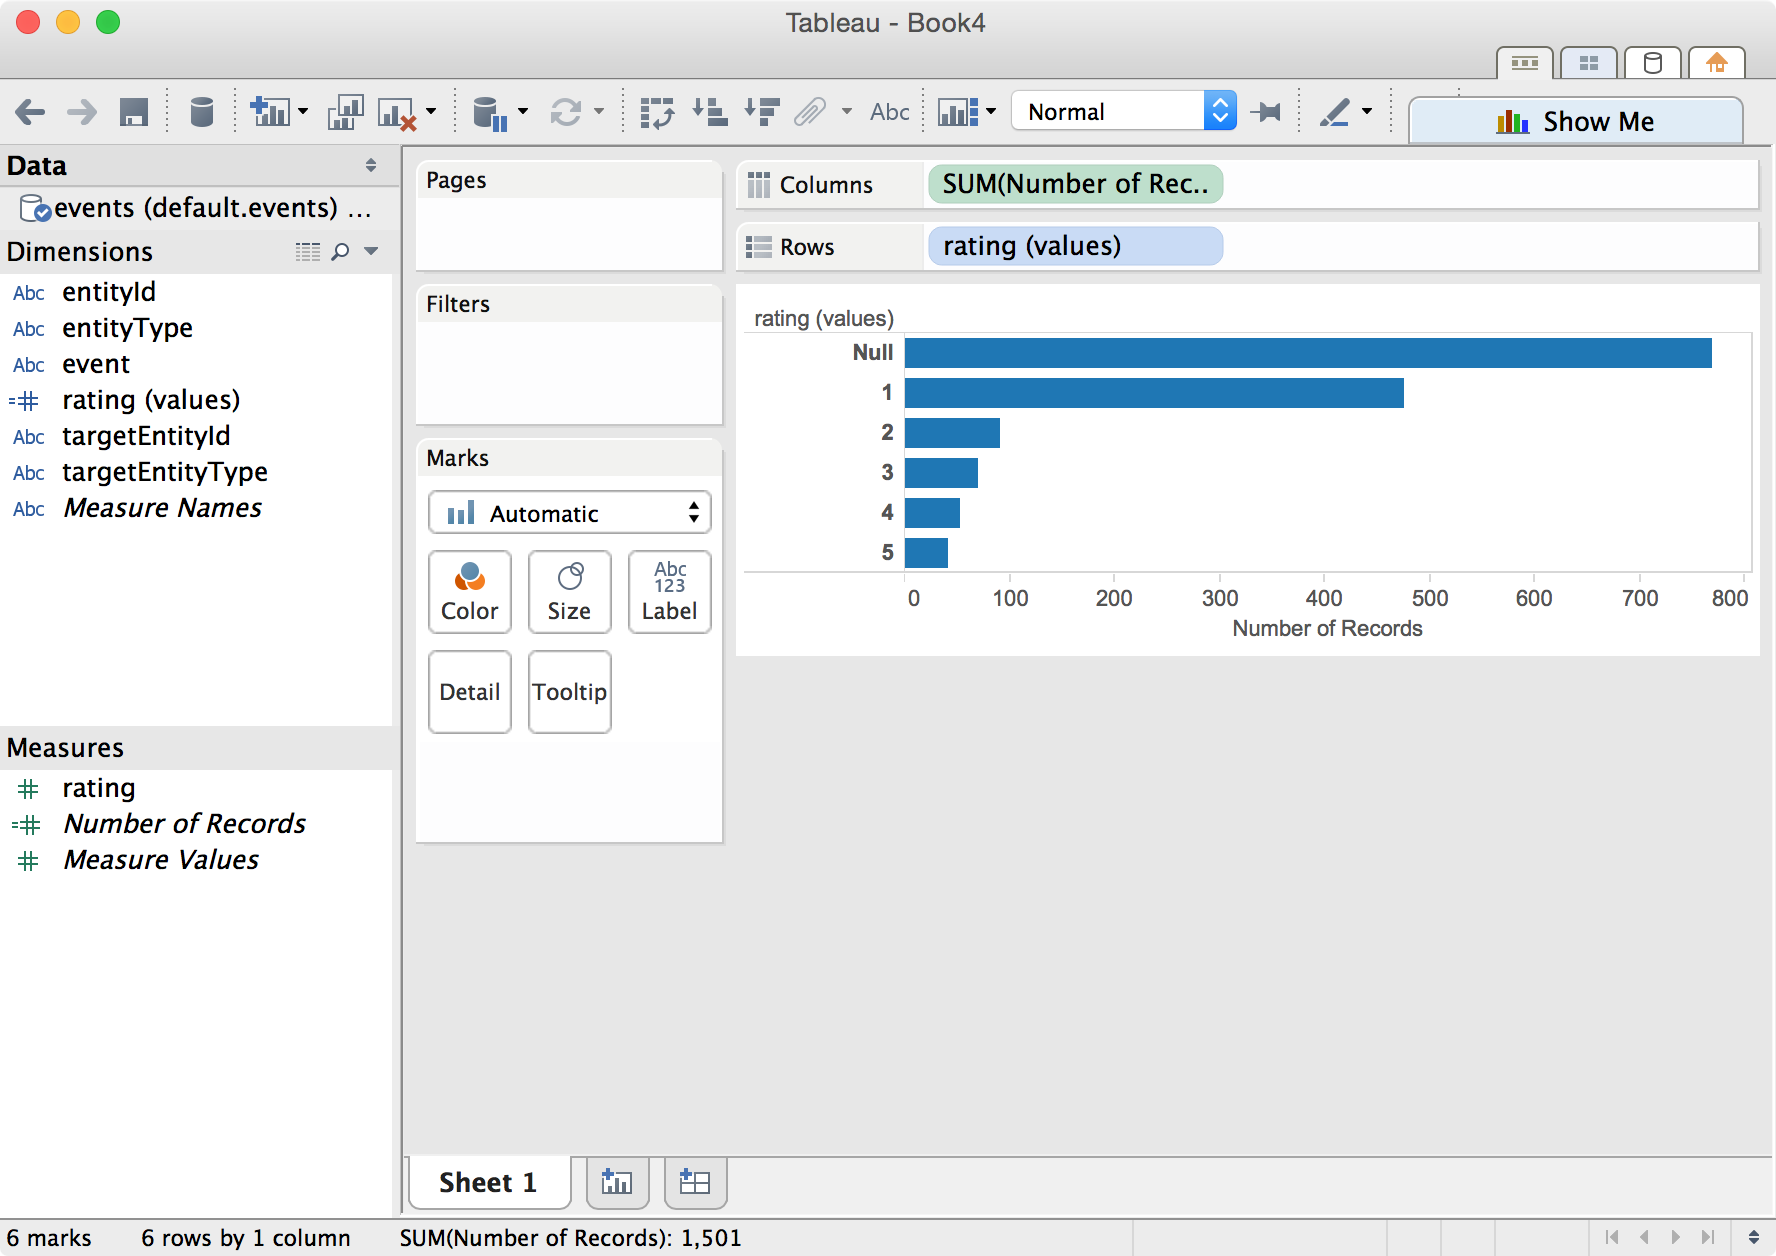
Click Go to Worksheet and start analyzing. The following shows an example of breaking down different rating values.

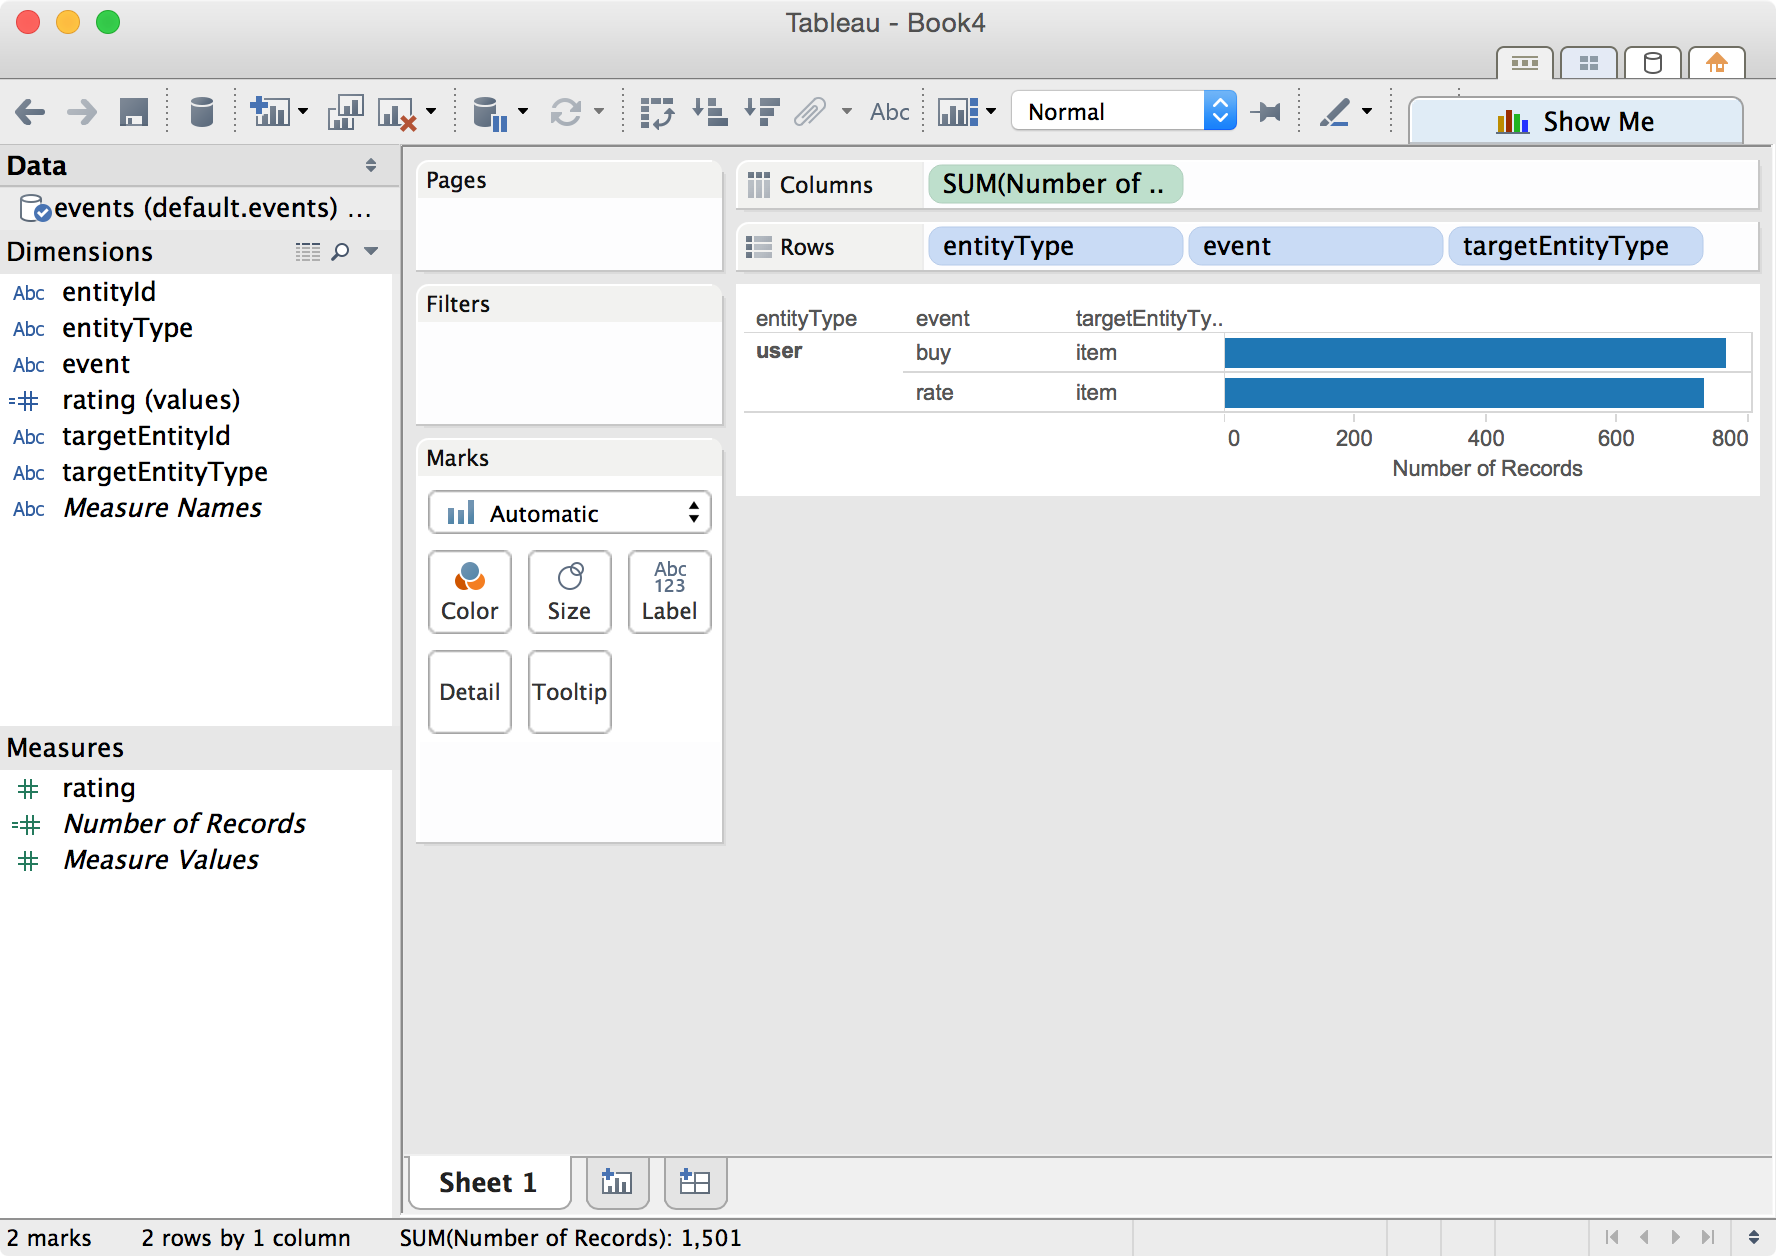
The following shows a summary of interactions.

Happy analyzing!
